Dr․ Caldwell Esselstyn’s groundbreaking approach emphasizes a plant-based diet to prevent and reverse heart disease, focusing on whole, unprocessed foods to promote optimal health and longevity․
Overview of the Esselstyn Food List
The Esselstyn Food List is a comprehensive guide to adopting a plant-based diet, focusing on whole, unprocessed foods to promote heart health and overall wellness․ It eliminates meat, dairy, eggs, and processed items, emphasizing fruits, vegetables, whole grains, and legumes․ The list avoids oils, sugars, and excessive salt, encouraging natural flavors from herbs and spices․ It also highlights Dr․ Esselstyn’s favorite greens, such as kale and spinach, for their nitric oxide benefits․ This approach aims to reverse heart disease and improve longevity through nutrient-dense, minimally processed meals․
Importance of a Plant-Based Diet for Heart Health
A plant-based diet is crucial for heart health, as it eliminates foods that contribute to cardiovascular disease, such as meat, dairy, and processed items․ By focusing on whole, unprocessed foods, the diet reduces cholesterol, blood pressure, and inflammation, key factors in heart disease․ Dr․ Esselstyn’s research shows that this approach can reverse heart disease by promoting nitric oxide production, improving blood flow, and strengthening arterial health․ The diet’s emphasis on greens, fiber, and antioxidants further supports cardiac well-being, making it a scientifically-backed approach to preventing and reversing heart conditions effectively․

Key Principles of the Esselstyn Diet
The Esselstyn Diet focuses on a plant-based lifestyle, eliminating meat, dairy, and processed foods while emphasizing whole, unprocessed foods to promote heart health and disease prevention․
Focus on Whole, Unprocessed Foods
Dr․ Esselstyn’s diet prioritizes whole, unprocessed foods, eliminating meat, dairy, eggs, oil, sugar, and processed items․ Emphasizing fruits, vegetables, whole grains, legumes, and nuts, the diet avoids harmful additives and preservatives․ By focusing on natural, nutrient-dense foods, it ensures optimal fiber, vitamin, and antioxidant intake, supporting heart health and overall well-being․ This approach aligns with Dr․ Esselstyn’s strategy to prevent and reverse heart disease through a plant-based lifestyle․
Elimination of Meat, Dairy, and Eggs
Dr․ Esselstyn’s diet strictly excludes meat, dairy, and eggs, as these foods are high in saturated fats and cholesterol, which contribute to heart disease․ By removing these, the diet reduces inflammation and plaque buildup in arteries, lowering the risk of cardiovascular events․ This approach is central to Dr․ Esselstyn’s strategy for preventing and reversing heart disease, promoting a clean, plant-based lifestyle that focuses on natural, heart-healthy alternatives․
Reduction of Oil, Sugar, and Salt
Dr․ Esselstyn’s diet emphasizes the elimination of oil, sugar, and salt to minimize their harmful effects on cardiovascular health․ Oil, even in small amounts, can contribute to plaque buildup in arteries․ Sugar promotes inflammation and insulin resistance, while excessive salt increases blood pressure․ By drastically reducing these substances, the diet helps lower cholesterol, reduce inflammation, and prevent heart disease progression․ This approach aligns with Dr․ Esselstyn’s goal of creating a heart-healthy lifestyle through simple, impactful dietary changes․

Core Components of the Esselstyn Food List
The Esselstyn Food List focuses on whole, unprocessed foods like fruits, vegetables, whole grains, and legumes, avoiding oil, sugar, and salt to provide essential nutrients naturally․
Recommended Fruits and Vegetables
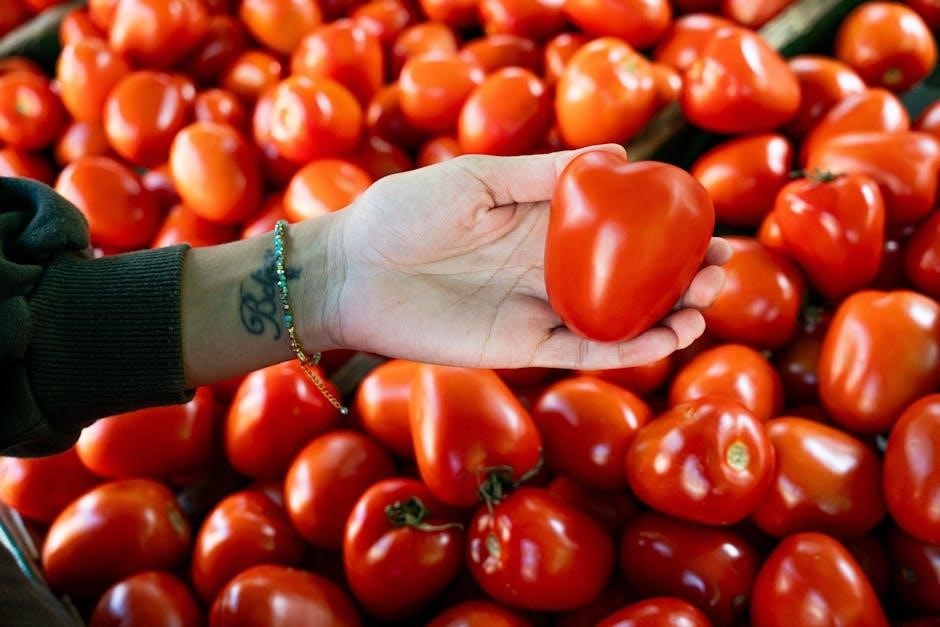
Dr․ Esselstyn’s plant-based diet emphasizes a wide variety of fruits and vegetables, focusing on leafy greens like kale, spinach, Swiss chard, arugula, beet greens, and beets, which boost nitric oxide production․ Berries, citrus fruits, and apples are rich in antioxidants, while cruciferous vegetables such as broccoli and Brussels sprouts support overall health․ The diet encourages whole, raw, or lightly cooked forms to retain fiber and nutrients, avoiding juices to prevent loss of beneficial compounds․ These foods provide essential vitamins, minerals, and fiber, helping to lower cholesterol and blood pressure naturally․
Role of Whole Grains in the Diet
Whole grains are a cornerstone of Dr․ Esselstyn’s diet, providing essential nutrients and fiber․ Options like brown rice, quinoa, barley, and millet are emphasized for their health benefits․ These grains help lower cholesterol and blood pressure, supporting heart health․ They are consumed in their whole form to retain fiber and nutrients, avoiding processed versions․ Whole grains also aid in satiety and stabilize blood sugar levels, making them a key component of a heart-healthy, plant-based lifestyle․ Their inclusion ensures a balanced and nutritious diet that aligns with the program’s goals of preventing and reversing heart disease․
Inclusion of Legumes and Nuts
Legumes and nuts play a significant role in Dr․ Esselstyn’s diet, offering protein, fiber, and essential nutrients․ Legumes like lentils and chickpeas are rich in antioxidants and support heart health․ While nuts are nutrient-dense, they are consumed in moderation due to their high fat content․ These foods help maintain a balanced diet, contributing to overall well-being․ Their inclusion aids in lowering cholesterol and managing blood pressure, aligning with the diet’s focus on preventing and reversing heart disease through plant-based nutrition․

Dr․ Esselstyn’s Favorite Foods for Heart Health
Dr․ Esselstyn highlights kale, spinach, Swiss chard, arugula, beet greens, and beets as top choices for nitric oxide production, essential for heart health and disease prevention․
Top 6 Greens for Nitric Oxide Production
Dr․ Esselstyn identifies six key greens that boost nitric oxide production, crucial for heart health: kale, spinach, Swiss chard, arugula, beet greens, and beets․ These greens are rich in nitrates, which the body converts into nitric oxide to relax blood vessels, improving circulation and lowering blood pressure․ Incorporating these into daily meals supports cardiovascular health and aligns with Dr․ Esselstyn’s plant-based approach to preventing and reversing heart disease․ Regular consumption of these greens is a cornerstone of his dietary recommendations for optimal wellness and long-term health benefits․
Best Sources of Fiber and Antioxidants
Dr․ Esselstyn’s diet emphasizes whole, unprocessed foods rich in fiber and antioxidants, which are essential for heart health․ Fruits like berries, apples, and pears, along with vegetables such as leafy greens, broccoli, and Brussels sprouts, provide abundant fiber and antioxidants․ Whole grains like quinoa, brown rice, and oats are also key sources of dietary fiber․ Legumes, including lentils and chickpeas, offer both fiber and antioxidants; These foods help reduce inflammation, improve digestion, and protect against oxidative stress, supporting overall cardiovascular well-being and aligning with Dr․ Esselstyn’s approach to preventing and reversing heart disease․

Foods to Avoid on the Esselstyn Diet

Foods to Avoid on the Esselstyn Diet
The Esselstyn diet prohibits meat, poultry, fish, dairy, eggs, oil, sugar, and processed foods, as these contribute to heart disease and hinder optimal health outcomes․
Prohibited Foods and Their Impact on Health
The Esselstyn diet strictly prohibits meat, poultry, fish, dairy, eggs, oil, sugar, and processed foods․ These foods are linked to increased cholesterol, blood pressure, and inflammation, contributing to heart disease․ Eliminating them reduces the risk of cardiovascular events and promotes overall well-being․ Oil, even in small amounts, is avoided due to its high calorie and fat content, which can hinder weight management and heart health․ Similarly, processed foods and added sugars disrupt blood sugar balance and contribute to chronic diseases․ By avoiding these, the diet helps lower cholesterol, improve blood flow, and support long-term health outcomes․
Why Processed Foods Are Excluded
Processed foods are excluded from the Esselstyn diet due to their high content of unhealthy additives, such as added sugars, oils, and salts․ These substances can lead to inflammation, increased cholesterol, and blood pressure, all of which are risk factors for heart disease․ Processed foods often lack essential nutrients and fiber, which are critical for maintaining healthy blood vessels and overall cardiovascular health․ By eliminating processed foods, the diet focuses on promoting whole, nutrient-dense foods that support optimal health and reduce the risk of chronic diseases like heart disease and diabetes․
Health Benefits of the Esselstyn Diet
The Esselstyn diet lowers cholesterol and blood pressure, reverses heart disease, and improves overall health by focusing on nutrient-rich, plant-based foods that promote long-term well-being․
Lowering Cholesterol and Blood Pressure
Adopting Dr․ Esselstyn’s plant-based diet significantly reduces cholesterol and blood pressure by eliminating saturated fats from animal products and processed foods․ The emphasis on whole, nutrient-dense foods like fruits, vegetables, and whole grains helps regulate blood flow and improve cardiovascular health․ Studies have shown that patients following this diet experience a dramatic drop in LDL cholesterol and systolic blood pressure, reducing the risk of heart disease and stroke․ This approach not only treats existing conditions but also serves as a preventive measure for long-term wellness․
Reversing and Preventing Heart Disease
Dr․ Esselstyn’s plant-based diet is proven to reverse and prevent heart disease by targeting its root causes․ By eliminating animal products, oils, and processed foods, the diet reduces arterial inflammation and plaque buildup․ The focus on whole, nutrient-rich foods improves blood flow and strengthens cardiovascular health․ Studies demonstrate that patients adhering to this diet experience significant reversal of heart disease symptoms and a reduced risk of future cardiac events․ This approach not only addresses existing heart conditions but also serves as a powerful preventive measure for long-term cardiovascular wellness․

Practical Tips for Following the Diet
Plan meals, create grocery lists, and focus on whole foods․ Avoid processed items and added oils․ Prep meals in advance to stay consistent and successful․
Meal Planning and Grocery Shopping Strategies
Plan meals weekly, focusing on whole, unprocessed foods like fruits, vegetables, whole grains, and legumes․ Create a grocery list to avoid impulse buys․ Shop the perimeter of the store for fresh produce, and stock up on pantry staples like brown rice, quinoa, and canned beans․ Avoid processed foods, oils, and added sugars․ Prep meals in advance to ensure consistency and convenience․ Consider organizing your pantry and fridge to prioritize healthy choices․ Use herbs and spices for flavor instead of salt or sugar․ These strategies help maintain adherence to the diet and promote long-term success․
Cooking Methods to Enhance Flavor
Dr․ Esselstyn recommends using herbs, spices, and creative cooking techniques to enhance flavor without added oils or sugars․ Roasting vegetables like Brussels sprouts or sweet potatoes brings out natural sweetness․ Steaming with garlic or ginger infuses flavor․ Sautéing with vegetable broth or water instead of oil maintains crispiness and taste․ Marinating in vinegar, lemon juice, or spices adds depth․ Baking or grilling with seasonings like paprika, cumin, or chili powder boosts flavor․ These methods ensure meals are vibrant and satisfying while adhering to the diet’s guidelines․

Additional Resources and Guides
Discover Dr․ Esselstyn’s PDF documents, including his food list and pyramid, for a comprehensive guide to implementing the diet effectively and sustainably for heart health․
Recommended Reading and PDF Documents
Dr․ Esselstyn’s food list PDF is a cornerstone resource, offering a detailed guide to approved foods for heart health․ His bestselling book, Prevent and Reverse Heart Disease, provides scientific backing and success stories․ Additional PDFs, such as the Wahls Protocol and Plant-Based Nutrition Quick Start Guide, complement his approach․ These resources outline meal plans, grocery tips, and cooking strategies, ensuring a smooth transition to a plant-based lifestyle․ They emphasize whole grains, legumes, and greens while avoiding processed foods, oil, and sugar, aligning with Dr․ Esselstyn’s principles for optimal heart health and disease reversal․
Online Communities and Support Groups
Joining online communities and support groups can greatly enhance your journey on Dr․ Esselstyn’s plant-based diet․ Active forums and social media groups dedicated to heart health and plant-based living offer valuable discussions, recipes, and motivation․ Resources like the Engine 2 Diet community and Dr․ Neal Barnard’s Program for Reversing Diabetes provide additional guidance․ Many groups share PDF documents, including meal plans and grocery tips, to help you stay on track․ Engaging with these communities ensures you never feel isolated and always have access to expert advice and peer support for sustained success․