Trevor Noah’s memoir‚ Born a Crime‚ is a humorous yet poignant account of his childhood in apartheid South Africa‚ blending trauma with resilience and humor.
Overview of the Memoir
Born a Crime is a memoir by Trevor Noah‚ recounting his childhood in apartheid South Africa. It weaves together stories of his upbringing as a mixed-race child in a society where his existence was illegal. Noah’s narrative balances humor with poignant reflections on identity‚ race‚ and belonging. The memoir explores his experiences navigating a world where he often felt like an outsider‚ while highlighting the resilience and strength of his mother‚ who defied societal norms to raise him. Through vivid storytelling‚ Noah sheds light on the complexities of life under apartheid and its aftermath‚ blending personal struggles with broader historical context. The book is celebrated for its raw honesty and uplifting message of hope and survival.
Historical Context of Apartheid in South Africa
Apartheid‚ a system of institutionalized racial segregation‚ dominated South Africa from 1948 to the early 1990s. It was enforced by the National Party‚ which classified people into racial groups—white‚ black‚ colored‚ and Indian—and denied non-whites basic rights. Interracial relationships were criminalized under laws like the Immorality Act‚ making Trevor Noah’s birth to a black mother and white father illegal. Apartheid created a society of severe inequality‚ with non-whites facing poverty‚ limited education‚ and political exclusion. The regime enforced segregation in housing‚ education‚ and employment‚ fostering a culture of oppression. This backdrop shaped Noah’s childhood‚ as he navigated a world where his very existence was a violation of the law‚ reflecting the broader struggles of South Africa under apartheid rule.
The Significance of the Title “Born a Crime”
The title Born a Crime reflects Trevor Noah’s literal and symbolic birth into a world of racial injustice. In apartheid South Africa‚ his mixed heritage made him a criminal by birth‚ as interracial unions were illegal under the Immorality Act. The title underscores the absurdity of a system that criminalized existence based on race. It also highlights Noah’s journey of self-discovery and resilience‚ transforming a label of shame into a story of triumph. The title encapsulates the memoir’s themes of identity‚ discrimination‚ and the fight against systemic oppression‚ serving as a powerful metaphor for the broader struggles of marginalized communities under apartheid.
Trevor Noah’s Early Life and Background
Trevor Noah was born to a black Xhosa mother and a white Swiss father in Johannesburg‚ South Africa‚ during apartheid‚ a time when interracial relationships were illegal.
The Unique Circumstances of His Birth
Trevor Noah was born in 1984 to a black Xhosa mother and a white Swiss father in Johannesburg‚ South Africa. Under apartheid laws‚ interracial relationships were illegal‚ making his birth a criminal act. His mother‚ Patricia Nombuyiselo Noah‚ faced significant risks to ensure his safety. Trevor’s mixed heritage made him an outcast in both black and white communities‚ as he did not fully belong to either. This unique circumstance shaped his identity and experiences‚ as detailed in his memoir Born a Crime. The illegal nature of his birth due to apartheid’s racial segregation had a profound impact on his early life and worldview.
His Relationship with His Mother
Trevor Noah’s relationship with his mother‚ Patricia Nombuyiselo Noah‚ was deeply influential and complex. She was a strong-willed black Xhosa woman who defied apartheid laws to raise him despite the societal risks. Trevor often describes her as fiercely protective and strict‚ instilling in him a sense of resilience and determination. His mother played a pivotal role in his education and worldview‚ encouraging him to embrace his identity and navigate the challenges of a racially divided South Africa. Her unwavering support and love‚ despite the hardships they faced‚ shaped Trevor’s perspective on life and ultimately influenced his success as a comedian and storyteller.
Growing Up in Post-Apartheid South Africa
Growing up in post-apartheid South Africa‚ Trevor Noah experienced a society in transition‚ grappling with the aftermath of institutionalized segregation. The end of apartheid brought hope and chaos‚ as the country struggled to integrate its deeply divided population. Trevor navigated this complex landscape‚ often finding himself caught between cultures and identities. Despite the progress‚ racial tensions and economic disparities persisted‚ shaping his worldview. His experiences during this period influenced his perspective on race‚ identity‚ and social justice‚ which he later channeled into his comedy and storytelling. This duality of hope and struggle defined his formative years‚ as he learned to adapt and thrive in a changing world.

Themes Explored in “Born a Crime”
Born a Crime explores themes of racial identity‚ discrimination‚ and resilience‚ highlighting Trevor Noah’s journey through a society divided by apartheid and its aftermath.
Racial Identity and Discrimination
Trevor Noah’s memoir delves deeply into the complexities of racial identity and discrimination‚ recounting his experiences as a mixed-race child in apartheid South Africa. Born to a black Xhosa mother and a white Swiss father‚ Noah navigated a world where his very existence was illegal under apartheid laws. The memoir vividly portrays the societal norms that enforced racial segregation and the discrimination he faced‚ both overt and subtle. Noah’s narrative explores how his unique identity often left him feeling like an outsider‚ even within his own community. His mother’s unwavering strength and teachings played a crucial role in shaping his understanding of self-worth amidst systemic racism. Through humor and raw honesty‚ Noah highlights the absurdities and cruelties of apartheid‚ offering a powerful commentary on race and identity.
The Role of Education in His Life
Educational experiences played a pivotal role in shaping Trevor Noah’s worldview and ambition. Despite the challenges posed by apartheid‚ Noah’s mother emphasized the importance of learning‚ encouraging his curiosity and linguistic skills. He learned multiple languages‚ including English‚ which became a tool for bridging cultural divides. Education not only provided Noah with a sense of purpose but also served as an escape from the harsh realities of his surroundings. His academic journey‚ though not without obstacles‚ laid the foundation for his future career as a globally recognized comedian and thinker. Through education‚ Noah gained the confidence to navigate a world beyond the confines of his neighborhood‚ showcasing its transformative power in his life.
The Power of Resilience and Humor
In Born a Crime‚ Trevor Noah highlights how humor and resilience became essential survival tools in his tumultuous childhood. Growing up in apartheid South Africa‚ Noah faced discrimination and adversity‚ yet he often used humor to defuse tense situations and find light in darkness. His ability to laugh at the absurdity of racism and oppression not only helped him navigate challenges but also connected him with others across cultural divides. Noah’s resilience was further bolstered by his mother’s unwavering strength and her refusal to let their circumstances define them; Through humor‚ Noah transformed painful experiences into relatable stories‚ showcasing how laughter can be both a shield and a bridge. This duality of resilience and humor shaped his identity and career‚ allowing him to thrive in a world that often seemed determined to hold him back.
Key Stories and Moments from the Book
Born a Crime shares pivotal moments from Trevor Noah’s life‚ including his rebellious childhood‚ navigating apartheid‚ and his mother’s unwavering support‚ shaping his journey to comedy and success.
Challenges Faced During Childhood
Trevor Noah’s childhood was marked by the illegal circumstances of his birth‚ as his mixed-race heritage made him a literal “crime” under apartheid laws. Growing up in Soweto‚ he faced deep racial discrimination and isolation‚ often feeling like an outsider in both black and white communities. Noah’s experiences were further complicated by poverty and the dangers of living in a volatile neighborhood. Despite these obstacles‚ his mother’s strength and resilience played a crucial role in shaping his perspective. Her unwavering support and determination to provide a better life for him inspired Noah to navigate the challenges of his environment with courage and wit.
- Racial isolation and discrimination shaped his early years.
- Poverty and danger were constant realities in Soweto.
- His mother’s resilience and love were his guiding forces.
His Journey to Becoming a Comedian
Trevor Noah’s journey to becoming a comedian was rooted in his early fascination with storytelling and humor as a coping mechanism. Growing up in post-apartheid South Africa‚ Noah found solace in comedy as a way to navigate the complexities of his mixed identity and societal expectations. He began performing stand-up in local comedy clubs‚ leveraging his unique perspective to connect with diverse audiences. His humor often reflected his experiences with race‚ culture‚ and politics‚ which resonated globally. Noah’s big break came when he became the first South African comedian to appear on The Tonight Show‚ followed by his historic role as host of The Daily Show‚ solidifying his status as a global comedy icon.
- Early interest in storytelling and humor as escape.
- Stand-up beginnings in South Africa’s comedy scene.
- Breakthrough on international stages and television.
The Impact of His Mother’s Strength
Trevor Noah’s mother‚ Patricia Nombuyiselo Noah‚ was a pillar of strength and resilience in his life. Her unwavering determination and courage in the face of apartheid’s oppressive laws shaped Trevor’s worldview and character. Despite the illegal nature of her relationship with a white man and the societal dangers it posed‚ she raised Trevor with fierce love and resourcefulness. Her strength inspired Trevor to navigate the complexities of his identity and the harsh realities of his environment. Patricia’s influence taught him resilience‚ adaptability‚ and the power of humor to survive adversity. Her unwavering support and lessons in defiance played a pivotal role in shaping the man Trevor became.

The Reception and Legacy of the Book
Born a Crime received widespread critical acclaim for its raw honesty and humor‚ earning numerous awards and becoming a global bestseller. Its cultural impact sparked conversations on race‚ identity‚ and resilience‚ solidifying Trevor Noah’s voice as a powerful storyteller and advocate for social justice. The memoir’s success led to adaptations‚ including an audiobook and translations‚ ensuring its message reaches a diverse audience worldwide.
Critical Acclaim and Awards
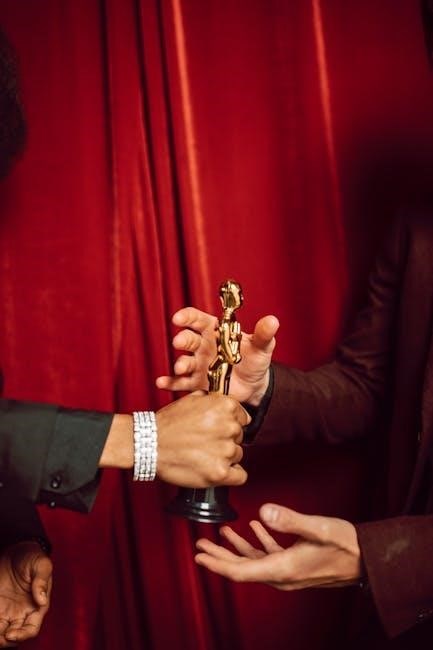
Born a Crime garnered widespread critical acclaim for its raw storytelling and humorous yet poignant narrative. The memoir earned Trevor Noah the prestigious Thurber Prize for American Humor‚ solidifying its literary impact. Reviewers praised Noah’s ability to blend humor with the harsh realities of apartheid‚ making the book both deeply personal and universally relatable. The memoir became a New York Times bestseller‚ further cementing its reputation as a landmark work in contemporary literature. Its success lies in its unflinching exploration of racial identity‚ discrimination‚ and resilience‚ resonating with readers globally and earning it a place among modern classics of autobiographical storytelling.
Popular Reception and Cultural Impact
Born a Crime resonated deeply with readers worldwide‚ becoming a New York Times bestseller and sparking crucial conversations about race‚ identity‚ and resilience. Its relatable humor and raw honesty made it a favorite among diverse audiences‚ fostering a sense of connection across cultures. The book’s success extended beyond print‚ with the audiobook‚ narrated by Noah himself‚ gaining immense popularity and further amplifying its reach. The memoir’s availability in PDF format made it accessible to a broader audience‚ ensuring its message of hope and understanding continues to inspire globally. This widespread reception solidified “Born a Crime” as a modern classic with lasting cultural impact.
The Book’s Adaptation and Availability
Born a Crime is widely available in various formats‚ including hardcover‚ paperback‚ e-book‚ and PDF. The PDF version‚ popular for its accessibility‚ allows readers to engage with Noah’s story on digital devices. Additionally‚ an award-winning audiobook‚ narrated by Trevor Noah‚ offers a unique listening experience‚ bringing his voice and humor directly to listeners. The memoir has also been adapted into educational materials‚ with excerpts used in classrooms to teach about apartheid and racial identity. Its widespread availability ensures that Noah’s powerful narrative reaches a global audience‚ making it a significant cultural and educational resource. This adaptability has further cemented the book’s legacy and impact.